How to Use Split Screen on the Newline Q Series Panel
One of the lesser known, but helpful features on the Newline Q Series Panels is the ability to split the panel screen to show two, or more, separate applications.
An example use-case for a Math teacher would be to show the very familiar Newline Whiteboard App. on one side of the panel, and a graphing calculator app. on the other side of the panel simultaneously. Similarly, a Social Studies teacher might want to show a whiteboard and a web-browser at the same time.
In this blog post, we can look at the process, and a few of the options around showing multiple applications on the panel.
Setting Up the Split-Screen
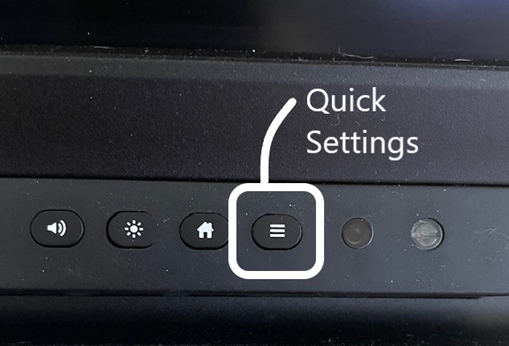
The ‘split-screen’ option is found from ‘Quick Settings’ menu, the right-most button on the bottom-right of the panel (figure 1).
Figure 1
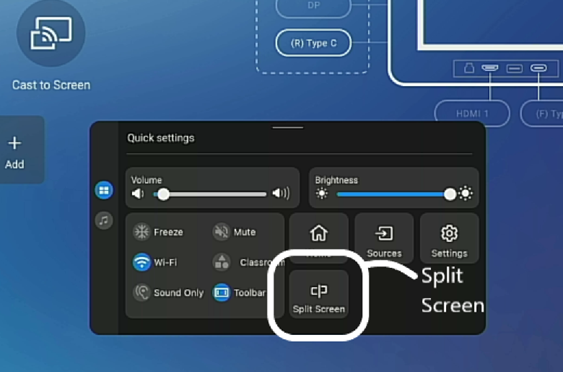
The ‘Split Screen’ option is initiated from the ‘Quick Settings’ menu (figure 2).
Figure 2
Once the ‘Split Screen’ option is initiated, you will be able to choose the application for the left-side (figure 3), and then for he right-side of the panel (figure 4). In this case, we have chosen the whiteboard and placed that on the left-side, and a free graphing calculator app. on the right-side.
Note – The free graphing calculator app. was installed from the ‘Newline App. Store’ and after a search on ‘math’.
Figure 3
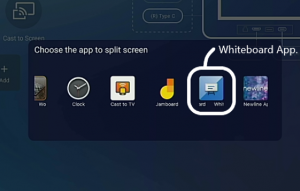
Figure 4
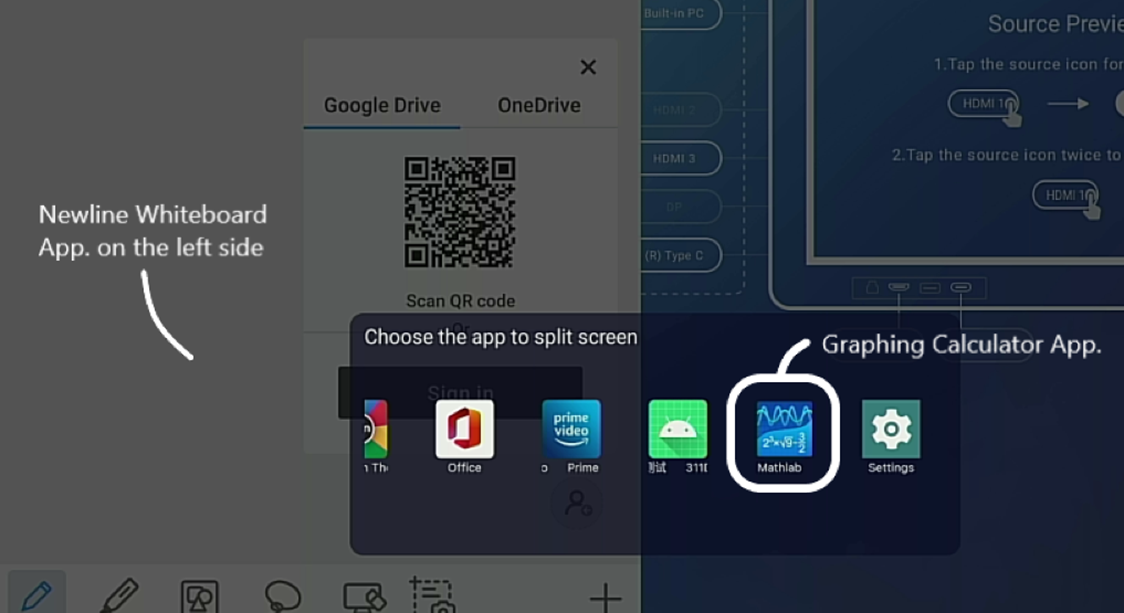
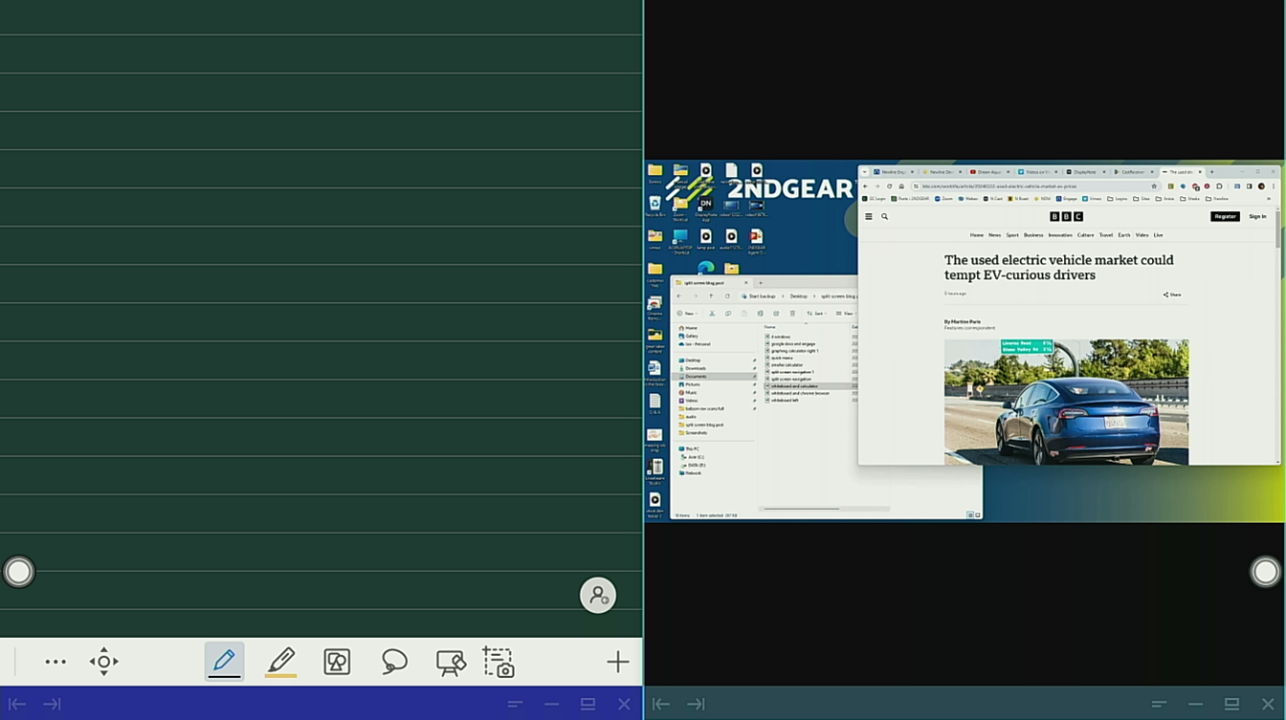
With the whiteboard on the left, and the calculator on the right, the educator can just move between the two applications seamlessly (figure 5).
Figure 5
Use Cases & Examples
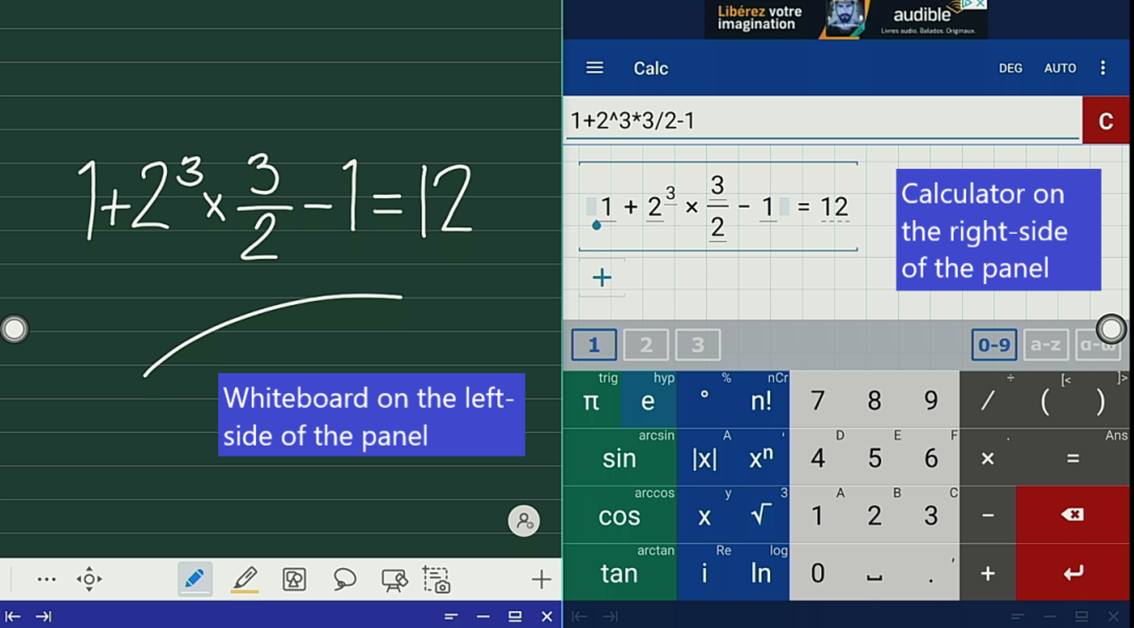
Another example use-case would be to have the whiteboard on the left-side, and a browser (Chrome in this case) on the right-side (figure 6). The browser can be used to navigate to a web site and the ‘Whiteboard Overlay’ tool (from the sidebar menu) can be used to snap an area of the browser and pasted onto the whiteboard.
Interactions can very fluent with a little practice.
Figure 6
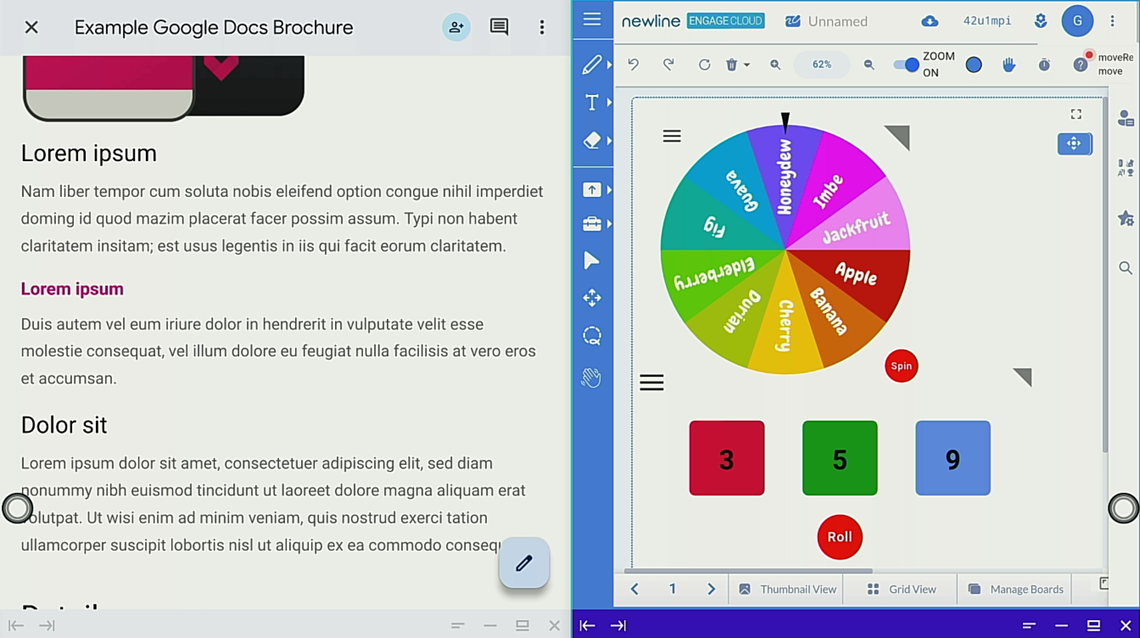
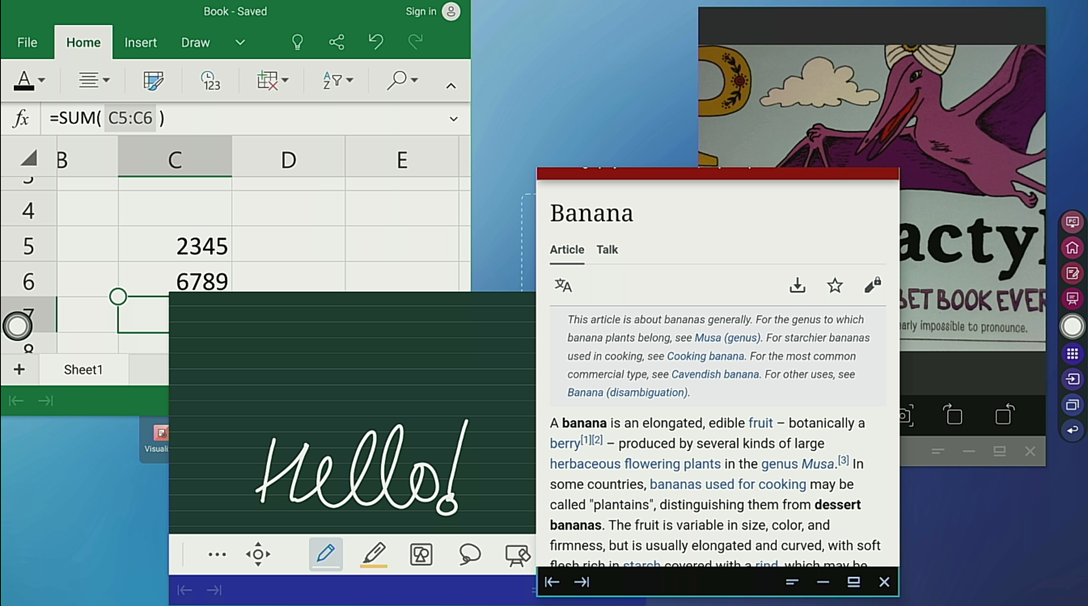
This process is also not tied to a specific brand or manufacturer. In the next example we have Google Docs on the left-side, and the Newline Engage App. on the right-side (figure 7).
The Newline Engage App. is something all Newline Panel owners have access to. This opens up the opportunity to use the lesson creation tools, word games, math game, spinners, calculators, the Chat CPT Assistant and so much more.
Google Docs opens up the wider access to multiple cloud documents. Similarly, this could be any other Google apps., Microsoft Office apps. etc.
Figure 7
Split-Screen Navigation
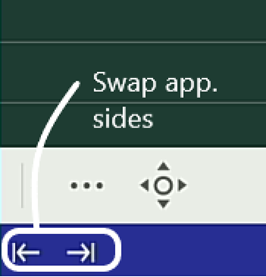
Once the split-screen apps are created, there are some navigation options that can be used to make things a little more interesting.
The arrows to the bottom-left of the app. windows will let you switch the sides of the apps. (figure 8). Using the arrows, you can have the apps. simply switch sides.
Figure 8
The next navigation options are a little more…ummm…’risky’. They don’t necessarily help your presentation, but here is my video on how to use them, and a little sneaky ‘trick’ along the way.
In this blog post, we will see if we can find a useful way through this navigation.
The additional navigation icons are to the bottom-right of the app. windows in the split-screen (figure 9).
Figure 9
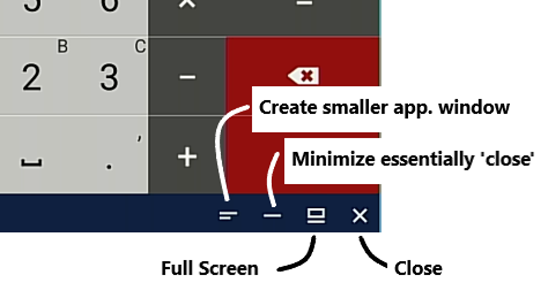
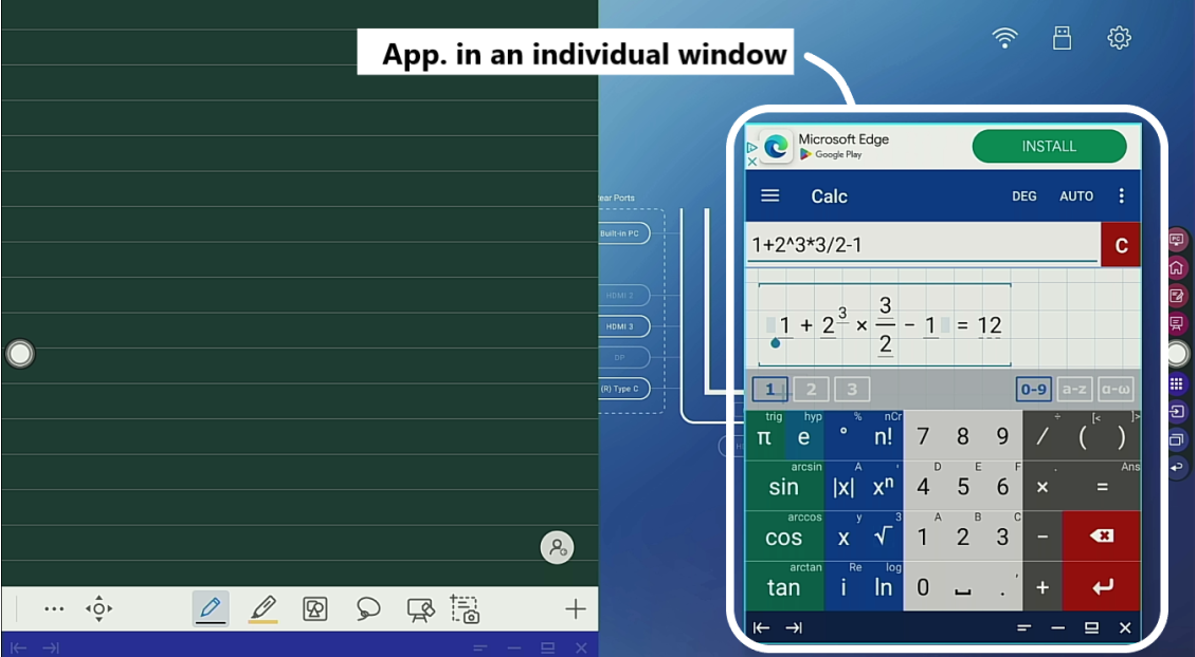
The left-most icon will take the app. window and move it to a smaller ‘window’ that you can resize and move around the panel (figure 10). This can be quite useful and helps create a more efficient real-estate if you do this with both app. windows.
Figure 10
The third icon will from the left will take the app window and make it ‘full screen’. The challenge with this is that you cannot go back to the original split-screen layout without starting again (at least I cannot easily see a way to do this).
Multiple Windows
If this happens to be a use-case, you can actually open up more than just the two applications. The way you would achieve this is to open up two applications as noted above, then use the left-most navigation icon (create smaller app. window) to take the split-screen apps. and turn them into smaller ‘windows’ on the screen.
Now, open the ‘Split-Screen’ option again from the ‘Quick Settings’ menu and repeat the process. Choose the apps. and turn them into smaller windows (figure 11). You can resize and drag the windows over the screen as you choose.
Tap the ‘Home’ icon on the sidebar menu to close all of the windows.
Figure 11
Casting your Desktop (for a little while anyway…)
This is a response to a very specific question from an educator. They wanted to have their desktop projected side-by-side with the whiteboard. The ‘Newline Cast App.’ would be a logical solution, as one of the split-screen apps. But Newline Cast is not available as an option (I am sure there is a technical reason for this, I will check with Newline).
In the meantime, I was able to find a free app. on the Google Play Store called ‘Cast Receiver’. This app. simply displays the feed from your Windows device, Mac etc. from the casting option in the Chrome browser. It works well for me.
Caveat – The trial of the app. allows 5 minutes of casting at a time, and as the app. has no option to upgrade and sign-in, you cannot upgrade to the full version from the panel. But it is very useful, and you can simply re-cast after 5 minutes…enough time for many videos.
Figure 12