Taking Snapshots with Document Cameras on Newline Panels: A Guide
There are many occasions where you might want to aggregate screenshots or snapshots onto your panel from other areas on the panel, or from your connected devices. You may also want to write over these images. This post is intended to give some workflows and scenarios that may help you speed up this process.
Taking a Screenshot on your Panel itself, and Moving it to the Whiteboard etc.
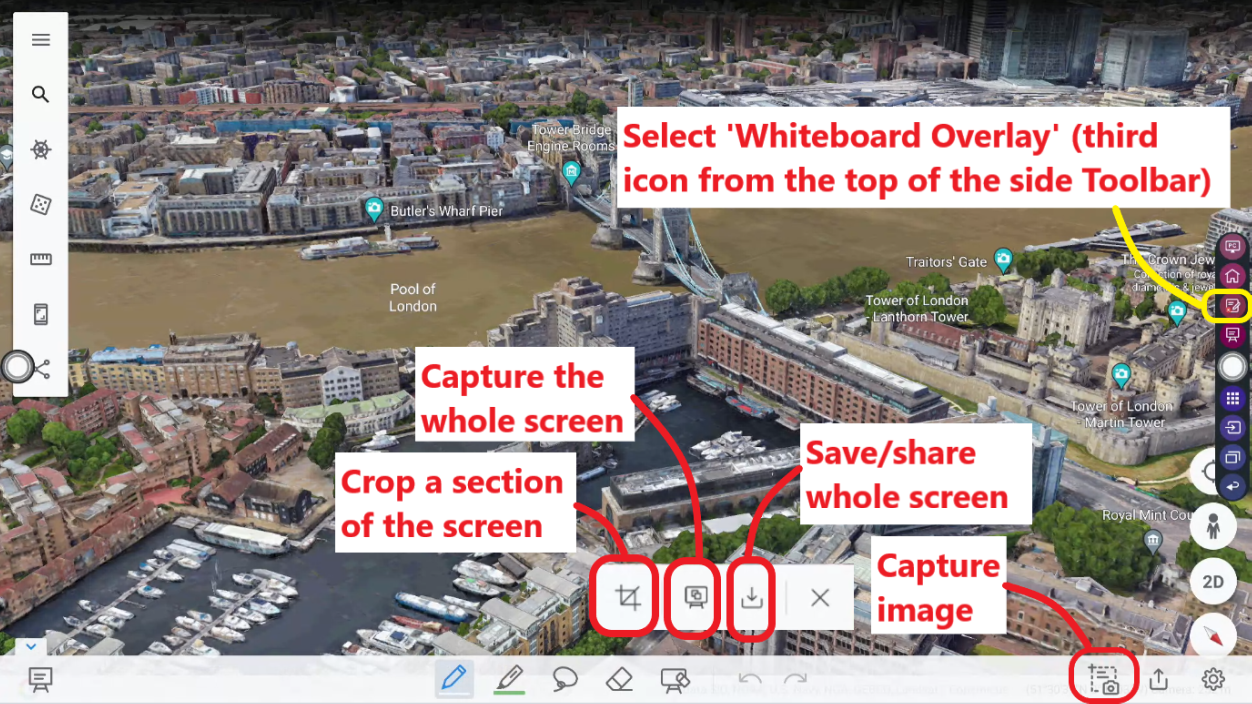
In this scenario, we are working somewhere on the panel, and we want to take a screenshot and either save it, or work on it in the whiteboard. We can use the Google Earth App. as an example. First, open the ‘Whiteboard Overlay’ from the side ‘Toolbar’ menu (the 3rd icon from the top). See figure 1 below.
Now you can select the camera icon to the bottom-right of the ‘Whiteboard Overlay’ menus to capture an image. Now you have a choice of cropping a section of the screen to use, or to capture the whole screen.
Figure 1
Crop a section of the screen – If you select the icon tot he left of the menu, you will see the crop area appear on the screen (figure 2). Adjust the crop area, and choose to either save to the Whiteboard, or share/save the content using another app. on the panel (figure 3).
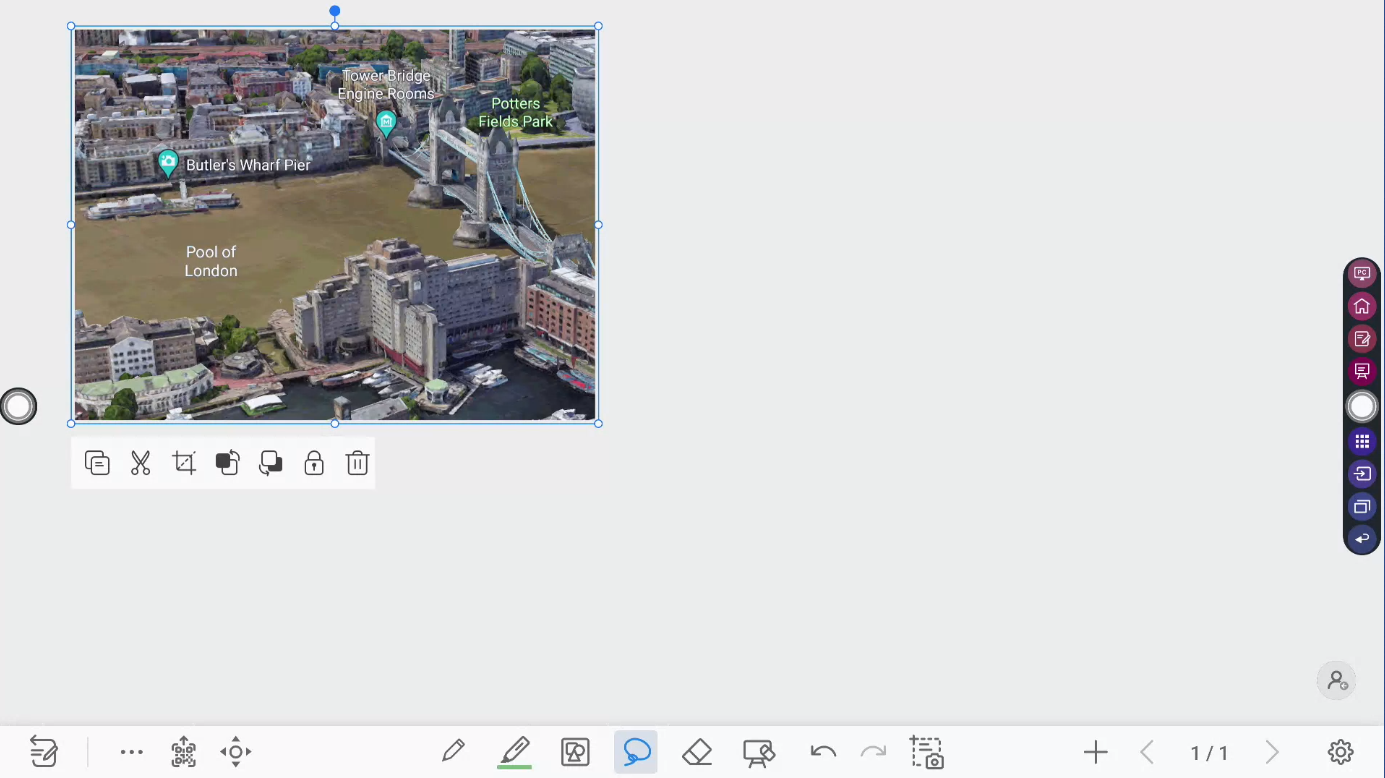
If you choose to save the cropped area to the whiteboard, it will appear on whatever panel you currently have selected on the Whiteboard (figure 4).
Figure 2
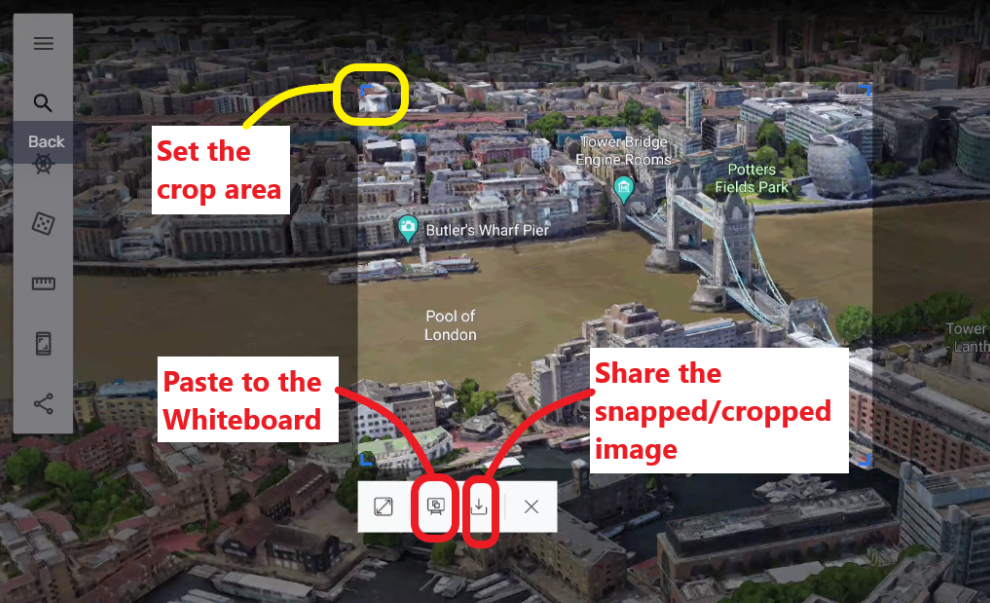
Figure 3
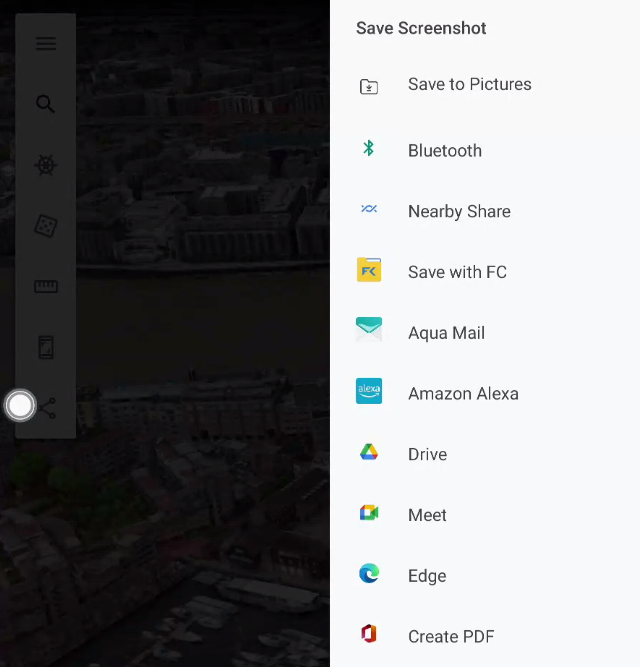
Figure 4
Take a snapshot of the Whole Screen – Similar to the process above, tap the second icon from the left in the capture menu (figure 1), and the whole screen will be immediately captured and pasted onto the Whiteboard.
Figure 5

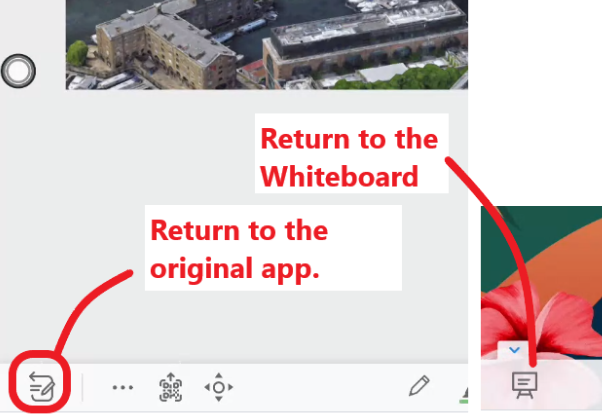
Note – You can jump back to the app. (from the Whiteboard) by tapping the ‘return’ icon to the bottom-left of the whiteboard. When in the app. again, you can switch back to the whiteboard using the ‘Whiteboard’ icon in the same bottom-left location. See figure 6.
Figure 6
Taking a Screenshot of a Device Attached to your Panel itself, and Moving it to the Whiteboard etc.
This is very similar to the use-cases and processes above. But the use-cases can be a little more interesting.
Using a Document Camera with a Connected Device – In this scenario, we have a document camera connected to my Chromebook, and the Chromebook is connected to the panel via the USB-C connection.
As detailed above, open the ‘Whiteboard Overlay’ and select the option and select a section of the screen to crop, in this case, a section of the IPEVO document camera app. (figure 7). Save this section of the screen to the whiteboard or save/share it as noted above in figures 2,3 & 4.
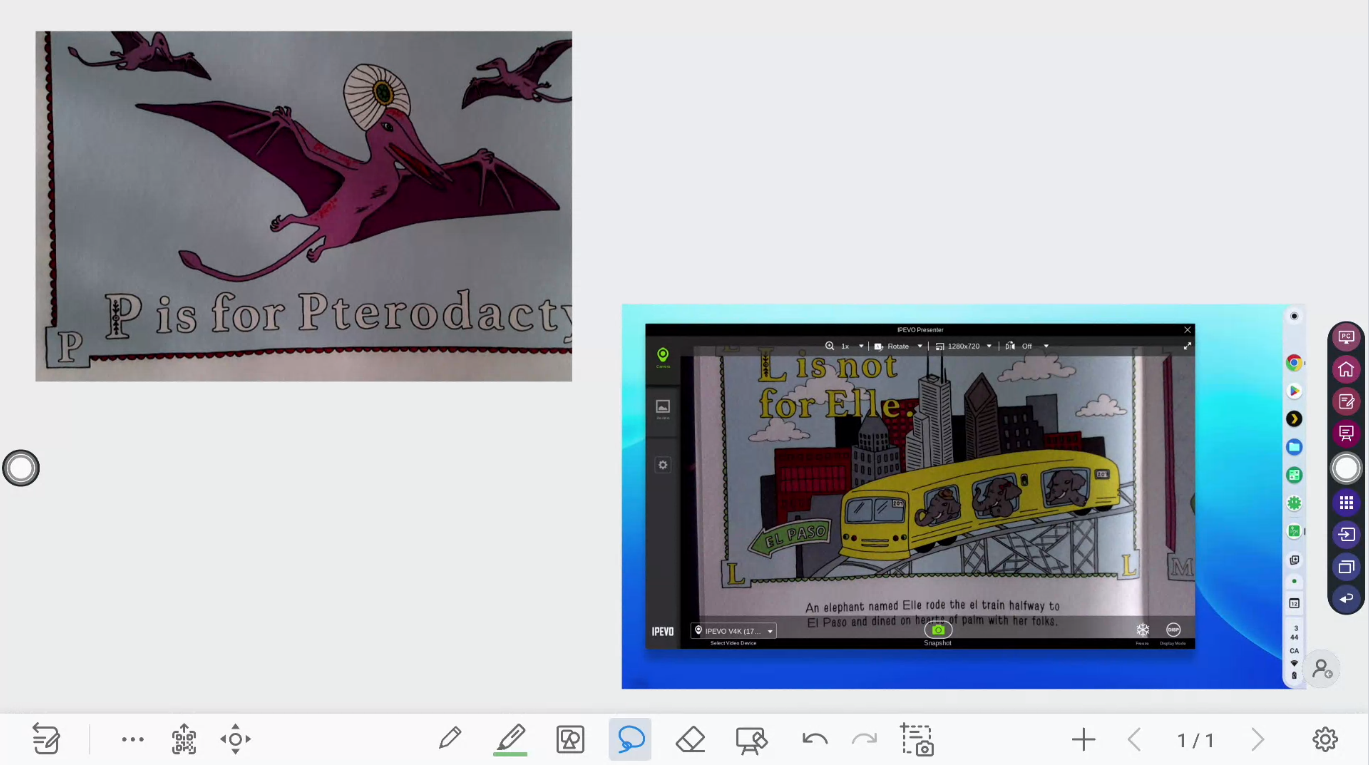
To capture the whole screen of the Chromebook, select the ‘whiteboard’ icon from the capture menu (figure 8) and this will immediately paste the whole of the screen-capture onto the whiteboard.
You an see both images in figure 9 below.
Figure 7
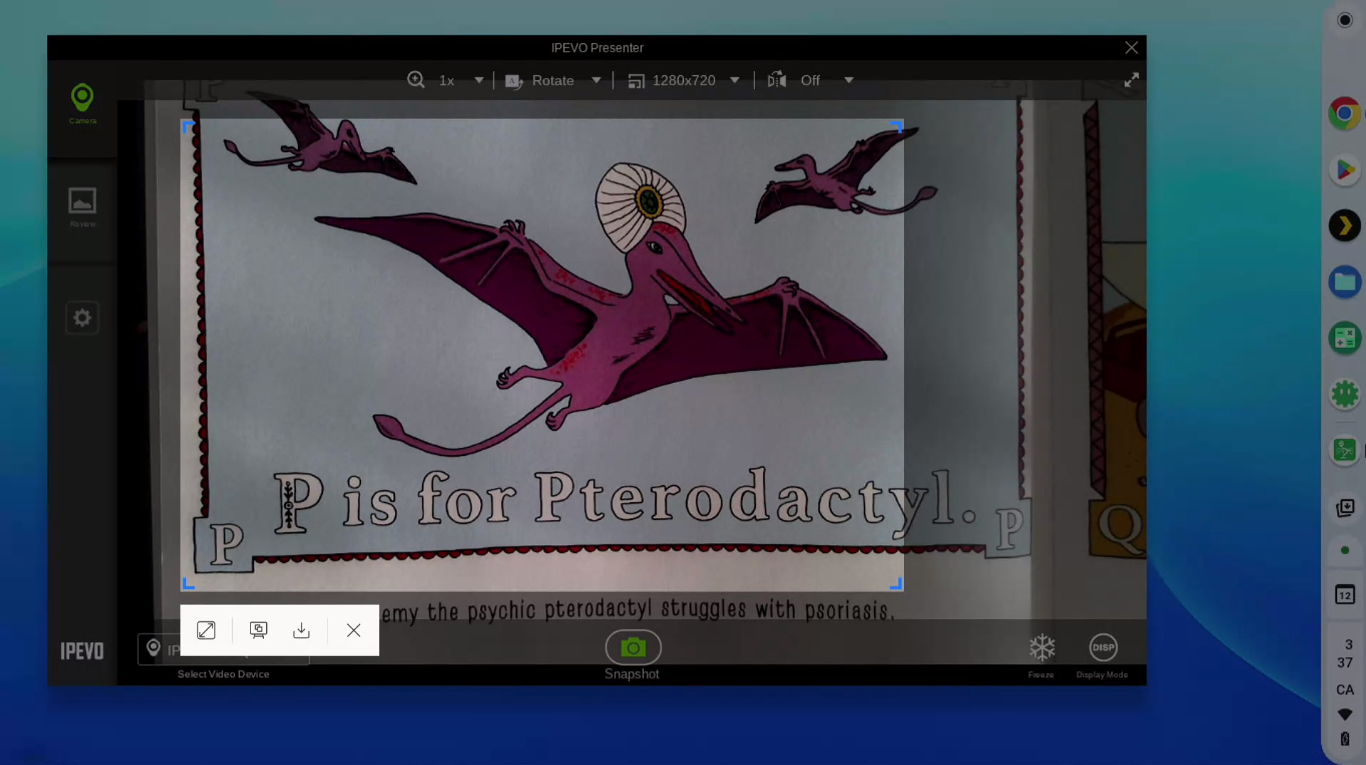
Figure 8
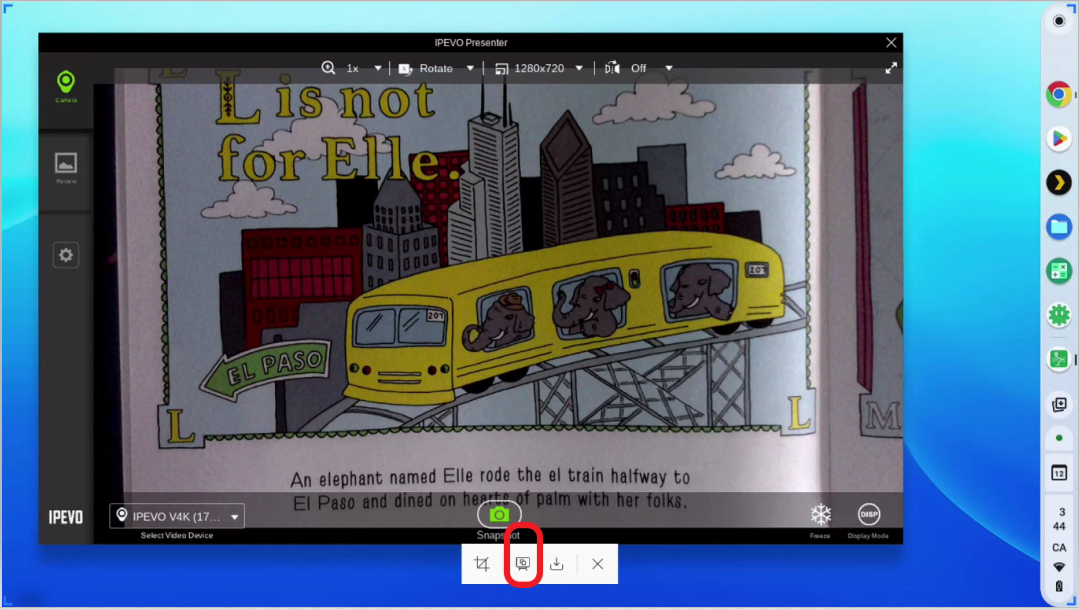
Figure 9
Note – The above use-case can be translated into an educator wanting to take a piece of work from a student, snap it with the document camera and switch to the next piece of work from a student and repeat. This allows the content to be quickly added to the Whiteboard, discussed, annotated, compared and saved easily.
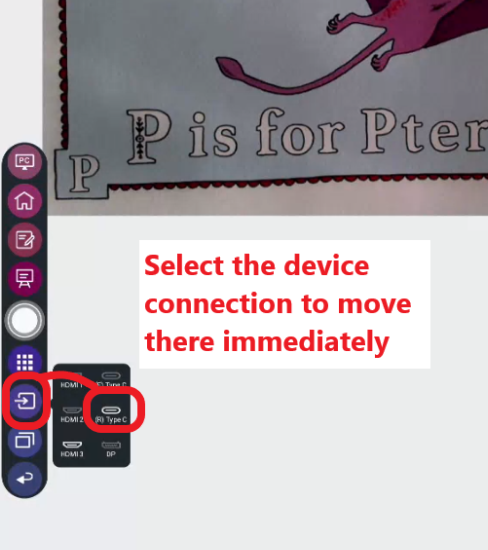
Note – You can quickly jump back to the PC from the Whiteboard using the side ‘Toolbar’. The 3rd icon from the bottom of the menu will show you all of the device connections (white if there is something connected, grey if there is nothing connected). Select the port that has your device connected to move there.
Figure 10